

Whether you're a professional tradesperson looking to streamline your workflow or a DIY home renovator tackling your first fence, these downloadable instructions are designed to make the process simple and stress-free. From standard paling fences to double paling and fence repairs, each guide provides practical, easy-to-follow information.
Download the PDFs below and have them ready whenever you need them, at home or on site

How to use the “W” Post
For quick access and convenience, we’ve created detailed step-by-step PDF guides for a variety of fencing jobs.
Easy to screw rails onto from behind

Use a sleeper as plinth block

Attach plinth to sleeper block

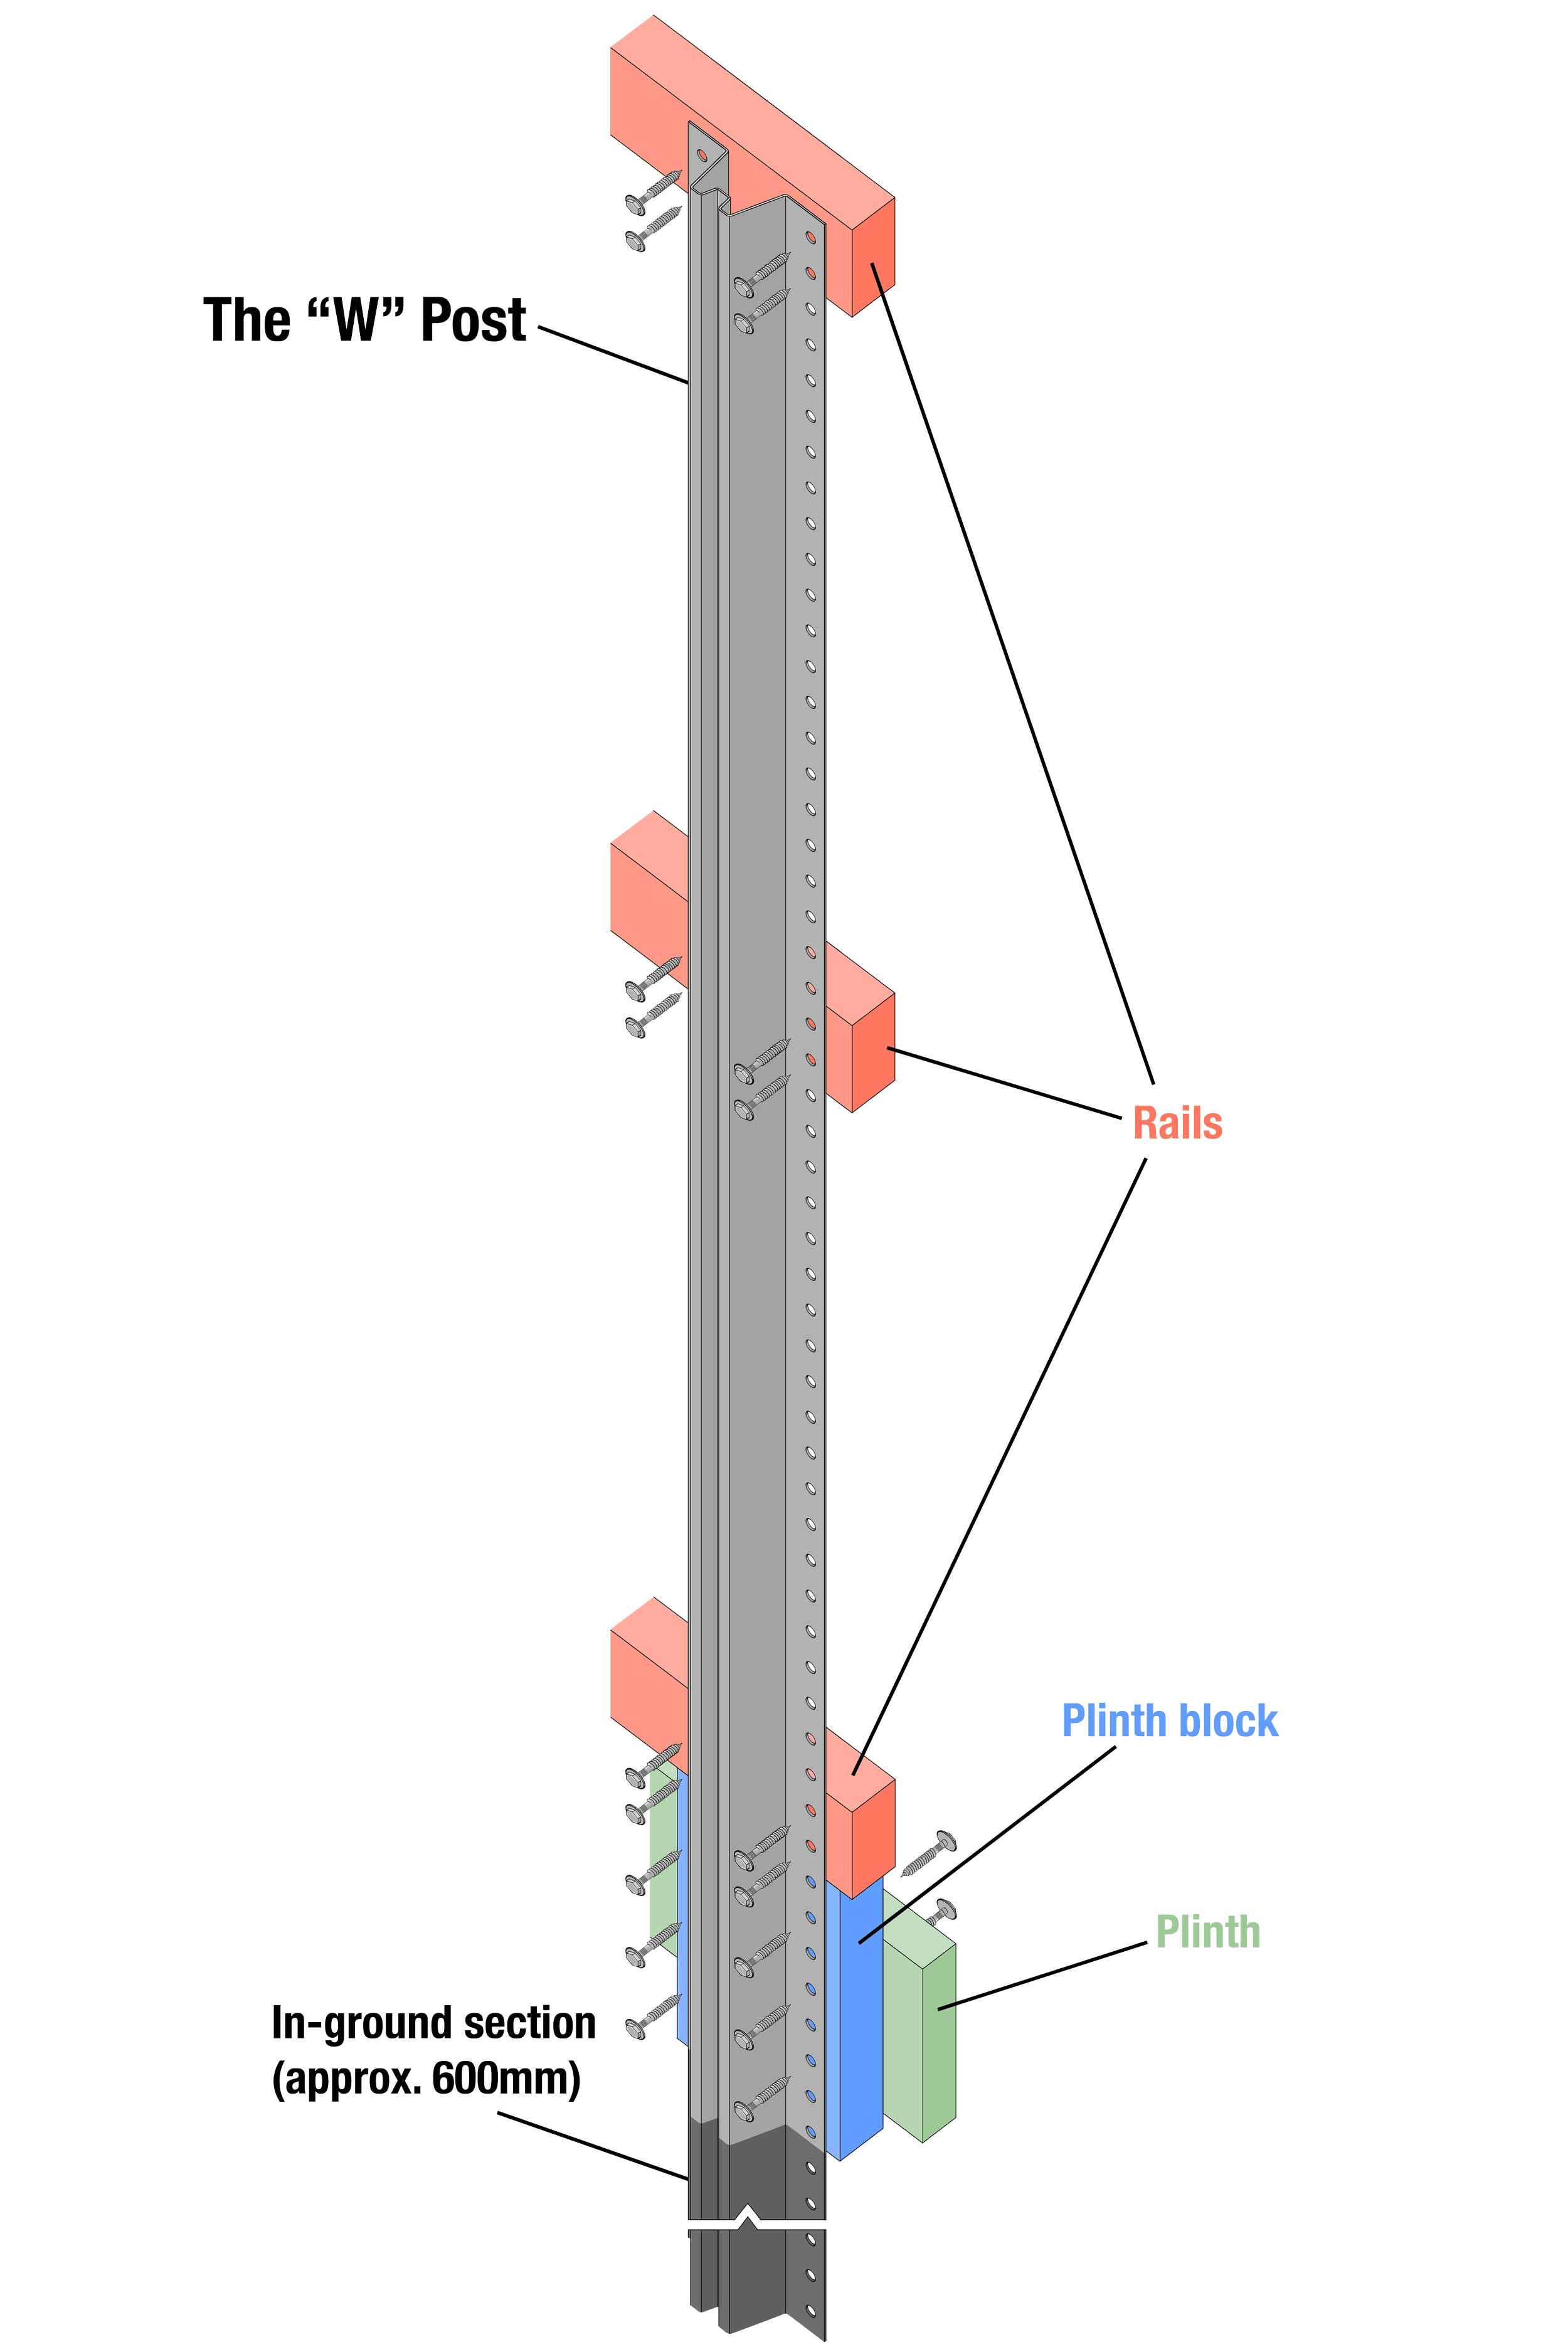
How it works

Unique “W” profile creates strength while keeping post lightweight
Hot dip galvanised surface means this post will easily outlast the rest of the fence
The 7mm holes at 30mm intervals down both sides of the post provide maximum flexibility to cope with any variations in the fence’s structure
Available in various lengths
Only one post type required - adapts to standard plinth, double plinth and capping easily
A simple alternative solution to stabilise/repair existing fences